mc²36 - Snapshot Module Isolates
Whenever a snapshot is recalled, either from the Snapshots or Cuelist display, you can choose to isolate individual channel DSP modules, on a per channel basis.
This feature is managed from the Iso Sets display. Selections are made using the Contents matrix (in a similar manner to Fade Sets). The current state of the Contents matrix can be saved as an Iso Set. This allows you to store and recall different matrix settings, or apply a specific set of isolates to individual snapshots.
The Global Activations mode determines how the isolates are applied:
- GLOBAL
= the Current status of the matrix is applied to all snapshot loads.
- SELECTIVE
= any Iso Sets that have been linked to snapshots are applied when the corresponding snapshots load.
The GLOBAL and SELECTIVE modes can be enabled together or independently. This allows you to combine the Contents matrix with snapshot-specific Iso Sets.
The Iso Sets Display

The Iso Sets display is divided into five areas:
- Folders – manages the snapshot folders stored in the current production.
- Iso Sets - lists the Iso Sets stored in the selected folder.
- Contents - shows the Current global isolates, a Preview of the selected Iso Set or the isolates applied to the Last Snapshot load.
- Operations - buttons for managing Iso Sets: Load, Merge, Save, Update, Delete and Protect.
- Global Activations - determines which isolation modes are active.
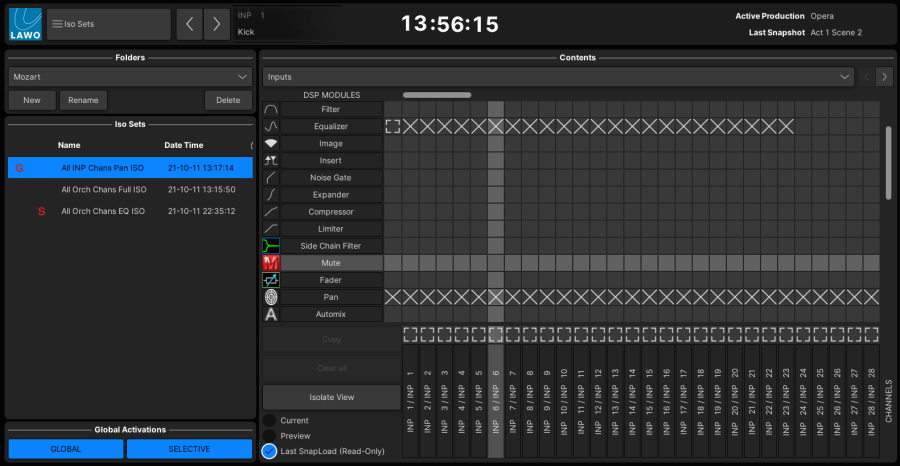
Note that either or both activation modes (GLOBAL and/or SELECTIVE) can be enabled. This allows you to combine the Contents matrix with the contents of an Iso Set linked to a specific snapshot - the G and S flags (in the Iso Sets area) indicate:
- G = the last global Iso Set to be loaded.
- S = the last selective Iso Set to be loaded (from a linked snapshot).
First Steps
1. Open the Iso Sets display on the Central GUI.
2. Select a Folder.
By default, Iso Sets are stored in the current snapshot folder (e.g. Mozart). They can be stored in any snapshot folder, but if you wish to link an Iso Set to a snapshot later, then both the Iso Sets and Snapshots must be stored in the same folder.
3. Make sure the view is set to Current (and not Preview or Last Snapshot).
In Current view, the crosses show which modules and channels are selected.
4. Use the on-screen matrix to select the DSP module(s) and channel(s) you wish to isolate.
You can use the drop-down menu (below Contents) to change the channel type.
The buttons to the left of each module and above each channel can be used to select all channels and/or all modules.
Iso Sets (example)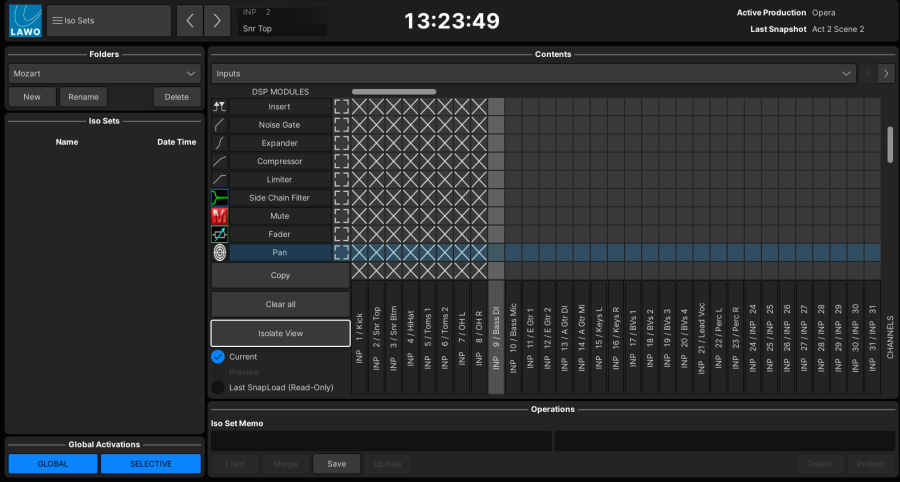
Recalling Snapshots with Module Isolates
1. Turn on the GLOBAL button (under Global Activations).
The Current status of the matrix is applied to all snapshot loads, including snapshot loads from a cuelist.
See Running a Cuelist and Loading a Snapshot for details.
Clearing Module Isolates
To disable module isolates, you can either turn off the GLOBAL activation mode or clear the Contents matrix.
The Contents Matrix
The Contents matrix has three modes which are selected from the radio buttons at the bottom of the matrix:
- Current - the current global isolates (applied when GLOBAL activation mode is enabled).
- Preview - a preview of the selected Iso Set.
- Last Snapshot, Read Only - the isolates applied to the last snapshot load. If both GLOBAL and SELECTIVE are enabled, then this mode shows the combined results.
In any of the modes, you can switch between two views: Isolate and Load. In Isolate View, the crosses indicate which DSP modules are in isolate. In Load View, the ticks indicate which DSP modules will load.
Isolate View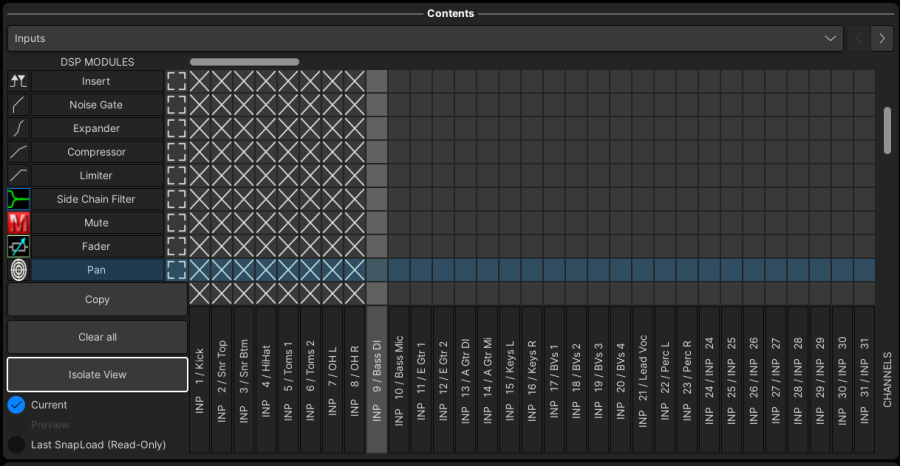
Load View
At the top of the matrix you can use the drop-down menu to choose different channel types - for example, Inputs for input channels.
When using the matrix:
- Click on an individual crosspoint to select a single DSP module on a single channel.
- Click on the ALL crosspoint fields (beside each row of DSP modules) to select a single DSP module across all channels.
- Click on the ALL crosspoint fields (above each channel) to select all DSP modules on a single channel.
Note that the ALL fields indicate:
- blank = nothing is selected.
- white box outline = something is selected.
- white cross (or tick) = everything is selected.
Use the scroll bars at the top and on the right of the matrix to access all CHANNELS and all DSP MODULES.
Copy (and Paste) can be used to copy and paste the selections from one channel (or DSP module) to another. Follow the on-screen instructions to use these functions.
Clear all can be used to clear all selections.
Selecting Module Isolates (from the surface)
Module Isolates can also be selected from the control surface. To use this method, you will need the MODULE ISO buttons (located in the CHANNEL area of the Central Control Section, in the Extra Buttons display or Central GUI side panel.
Central GUI Access/Assign Side Panel
1. Press the SEL ISO button on the surface or Extra Buttons display, or Select Isolate on the Access/Assign 3 side panel - it flashes (green) when active.
2. Select the DSP module(s) you wish to isolate by enabling the SEL buttons on the Central Control Section. See Selecting Channel Parameters.
3. Then press the fader SEL buttons to apply your chosen selections across multiple channels.
4. Open the Iso Sets display in Current view to check which modules and channels are selected.
5. When you have finished making selections, remember to turn off SEL ISO.
The CLEAR CURRENT button can be used to clear the current Contents matrix.
Working with Iso Sets
At any time, you can save the current state of the Contents matrix into a memory called an Iso Set. This allows you to store and recall different matrix settings, or apply a specific set of isolates to individual snapshots.
Each Iso Set can store any number of module isolates. And, different combinations of Iso Sets can be loaded back to the Contents matrix. This allows you to combine module isolates. For example, to combine isolates for the orchestra with those for the soloists.
Iso Sets are stored in the current snapshot folder within the active production.
Note that you must use Iso Sets to store and recall module isolates. |
Folders
Iso sets are stored in the current snapshot folder. The method used to change folder, create a New folder, Rename and Delete a folder is identical to the Snapshot List operations described earlier.
Note that, if you wish to link an Iso Set to an individual snapshot, then both the Iso Set and Snapshot must be stored in the same folder.
Iso Set Operations
Iso Sets are managed in a similar manner to snapshots. Note that the two sides of the display can be resized to view more fields for the Iso Sets.
Iso Sets list (resized)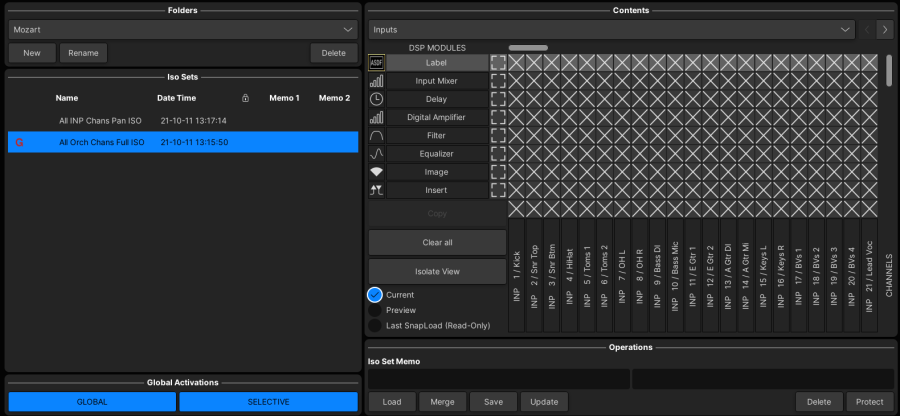
Iso Sets
- Name - click in the Name field to rename an iso set.
- Memo - click and type into the Memo1 or Memo2 fields to enter memo text.
- G indicates the last global Iso Set to be loaded.
- S indicates the last selective Iso Set to be loaded (from a linked snapshot).
Operations
- Load - loads the selected iso set to the Current Contents matrix.
- Merge - merges the selected iso set with the Current Contents matrix. Use this option to combine iso sets.
- Save - saves the Current Contents matrix into a new iso set.
- Update - updates the selected iso set with the Current Contents matrix.
- Delete - deletes the selected iso set.
Protect - protects (or unprotects) the selected iso set. Once protected, an iso set cannot be updated or deleted.
- To check the contents of an iso set:
1. Select the iso set you wish to interrogate.
2. Select the Preview radio button (at the bottom of the Contents matrix) - the display updates to show the contents of the selected iso set.
Iso Set in Preview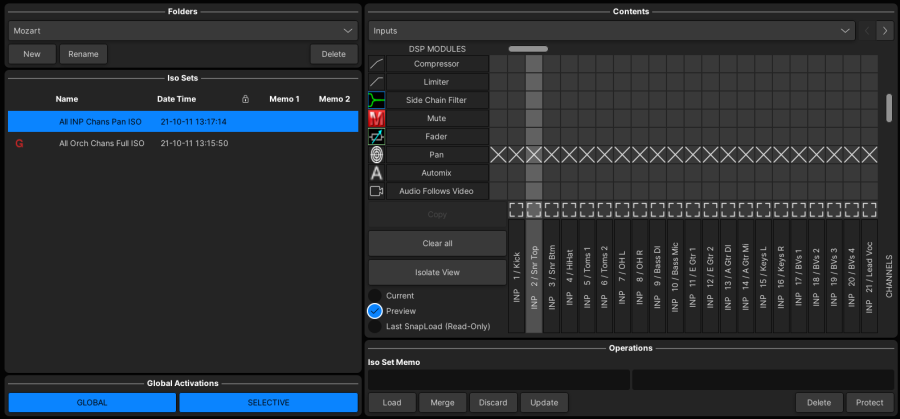
3. When you have finished interrogating stored iso sets, it is a good idea to switch back to the Current Contents matrix.
This way you can be sure that you are viewing the active module isolates (applied when GLOBAL activation is enabled).
Importing and Exporting Iso Sets
Iso Sets cannot be accessed individually from the File display, but they can be imported and exported by copying the snapshot folder:
1. Copy the snapshot folder containing your iso sets to a USB interface or network drive using the File Export function from the File display.
2. Connect your USB interface or network drive to the destination console.
3. And import the snapshot folder into the current production using File Import from the File display.
If you now open the Iso Sets display and select the imported folder, you will see your iso sets.
Snapshot Specific Iso Sets
You can link an iso set to an individual snapshot in order to apply different module isolates to each snapshot load.
1. First save all the snapshots and iso sets you wish to use.
2. Open the Snapshot List display.
3. Select one of the snapshots and left-click on the Isoset field - a drop-down menu appears.
4. Select the Iso Set you wish to link.
You must LEFT-click on the Iso Set field to access the drop-down menu. If you right-click, then the usual snapshot operations appear: load, update, etc. |
The menu includes all the Iso Sets which you saved earlier from the Iso Sets display.
Snapshot List display (Iso Set assign)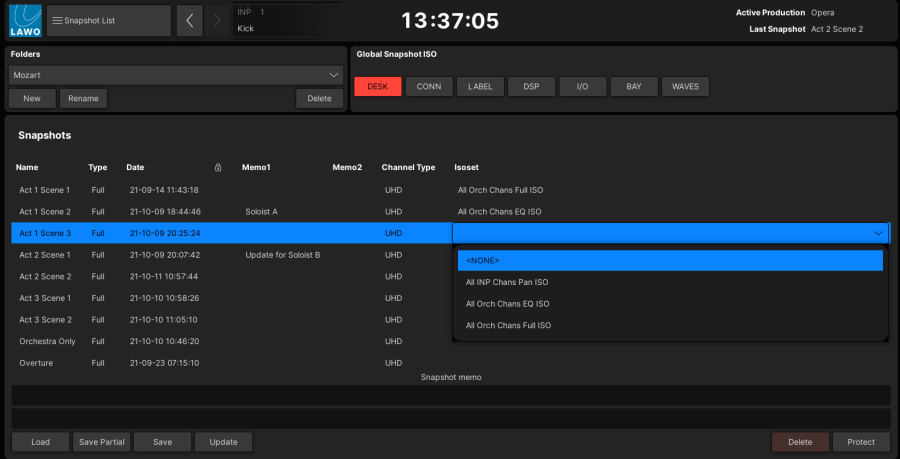
5. Return to the Iso Sets display and check that the SELECTIVE Global Activations mode is enabled (green).
The mode can also be enabled (or disabled) using the SELECTIVE ENABLE button in the CHANNEL area of the Central Control Section, on the Extra Buttons display or Central GUI side panel.
6. Then, from the Snapshots List display, Load one of the snapshots linked to an Iso Set.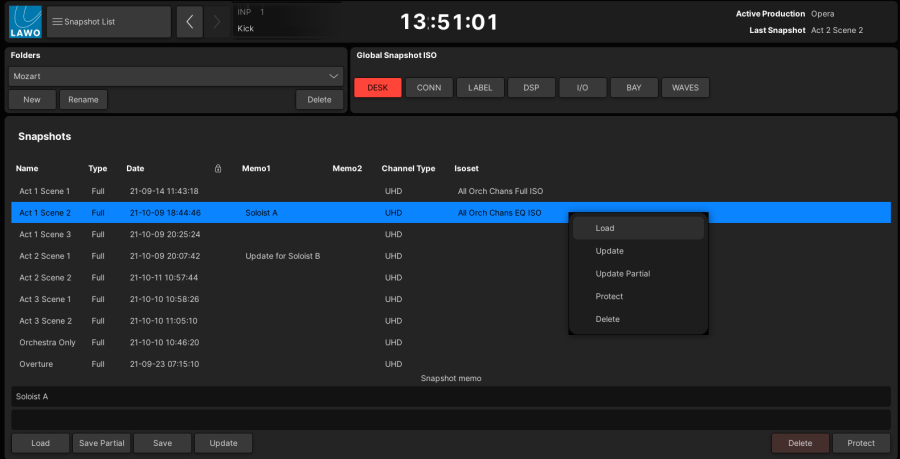
The linked Iso Set is applied to the snapshot load.
7. You can check what has been applied by returning to the Iso Sets display and selecting the Last Snapload (Read-only) radio button.
In this mode, the Contents matrix shows the isolates applied to the last snapshot load. If both GLOBAL and SELECTIVE are enabled, then you will see the combined results of the global isolates and selective isolates. This is indicated in the Iso Sets list as follows:
- G = the last global Iso Set to be loaded.
- S = the last selective Iso Set to be loaded (from a linked snapshot).
