mc²36 - Fader Strip Assign
Any physical fader strip can control any channel type: Input, Group, Aux, Sum, VCA. Surround VCA or GPC.
Fader strip assignments are saved and loaded by both snapshots and productions. This allows you to store a single layout (in the production), or multiple layouts for recall during a show (using snapshots).
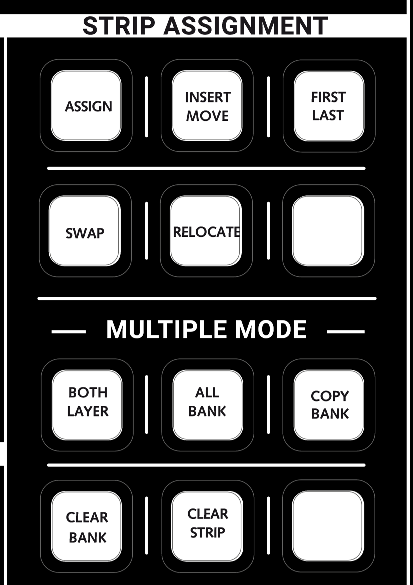
There are two ways to edit the current assignments: from the Channel Display touch-screen or surface (using the STRIP ASSIGNMENT buttons). The former is best if you need to change an individual fader strip. The latter can be used to assign either a single or range of fader strips in one operation.
Note that the STRIP ASSIGNMENT buttons can also be used for functions such as insert, move, swap and relocate. These operations are described later in mc²36 - Strip Assignment.
Fader Strip Assign (from the Channel Display)
The channel assigned to a fader strip can be adjusted from the Channel Display touch-screen (as shown below).
- Touch the current channel label (or mini display) to open the pop-up.
- Choose Assign Channel followed by a channel type and number. The selected channel is assigned, and the fader strip updates accordingly.
Fader Strip Assign (from the surface)
The STRIP ASSIGNMENT buttons (in the centre section) allow you to assign the channel in access to one or more fader strips.

For convenience, the same options can be selected from the Central GUI touch-screen (using the first two Access/Assign side panel pages).
|
|
In both cases, the STRIP ASSIGNMENT buttons can be locked (to protect the desk layout) by pressing the Lock ASN button located on the Extra Buttons display. Therefore, if you cannot assign a channel to a fader strip, check the status of this option.
Assigning a Single Fader Strip
The STRIP ASSIGN button allows you to assign the channel in access to a fader strip.
- Select a channel - either by pressing its fader SEL button or using the Access/Assign panel.
- Press the STRIP ASSIGN button (under STRIP ASSIGNMENT). The fader SEL buttons across the console flash, in green.
- Press a fader SEL to complete the assignment.
- You can press another fader SEL, to assign the same channel to another strip. For example, to duplicate the channel on a different BANK or LAYER.
- Deselect the STRIP ASSIGN button or press ESC (on the SCREEN CONTROL panel) to exit the strip assign mode.
Assigning Consecutive Fader Strips
The FIRST LAST button provides a quick way of assigning a range of channels to consecutive fader strips.
- Put the first channel you wish to assign into access - e.g. INP 1.
- Then press FIRST LAST (instead of STRIP ASSIGN). The fader SEL buttons across the console flash, in green.
- Press the fader SEL buttons on the first and last fader strips in the range (e.g. strip 1 and then strip 16).
- The console assigns the channels incrementally and then cancels the FIRST LAST mode.
- If all channels are mono, then INP 1 to 16 are assigned to fader strips 1 to 16.
- If some channels are stereo, then this is taken care of automatically. For example, if INP 1/2 and INP 3/4 are stereo, then they are assigned to fader strips 1 and 2; INP 5 is assigned to fader strip 3, INP 6 to fader strip 4, and so on.
- If some channels are surround, then it is the component channels which are assigned (e.g. L/R to fader strip 1, C to fader strip 2, etc). In this instance, it may be better to clear these strips and assign the Surround VCA master instead.
- Deselect the STRIP ASSIGN button or press ESC to exit the strip assign mode.
Please note:
- The start and end of the FIRST LAST range can be at any position across the control surface. Sources can be routed from left to right or from right to left by reversing the order of your first and last fader selection.
- FIRST LAST treats channel and main fader strips independently. This allows you to make changes to channel fader strips without affecting the main faders, or vice versa.

