The console's 3D Pan tool is designed to handle 3D immersive formats. It can be used to provide a different view of the selected channel (mono, stereo or surround) within the 3D field.
Important: The channel must be assigned to a multi-channel bus to turn on the panning.
The pan law applied depends on the format of the bus master. The supported 2D and 3D surround formats are described here.
Operating Principles
There are no physical controls for the 3D Pan tool and so it must be operated from the Main Display.
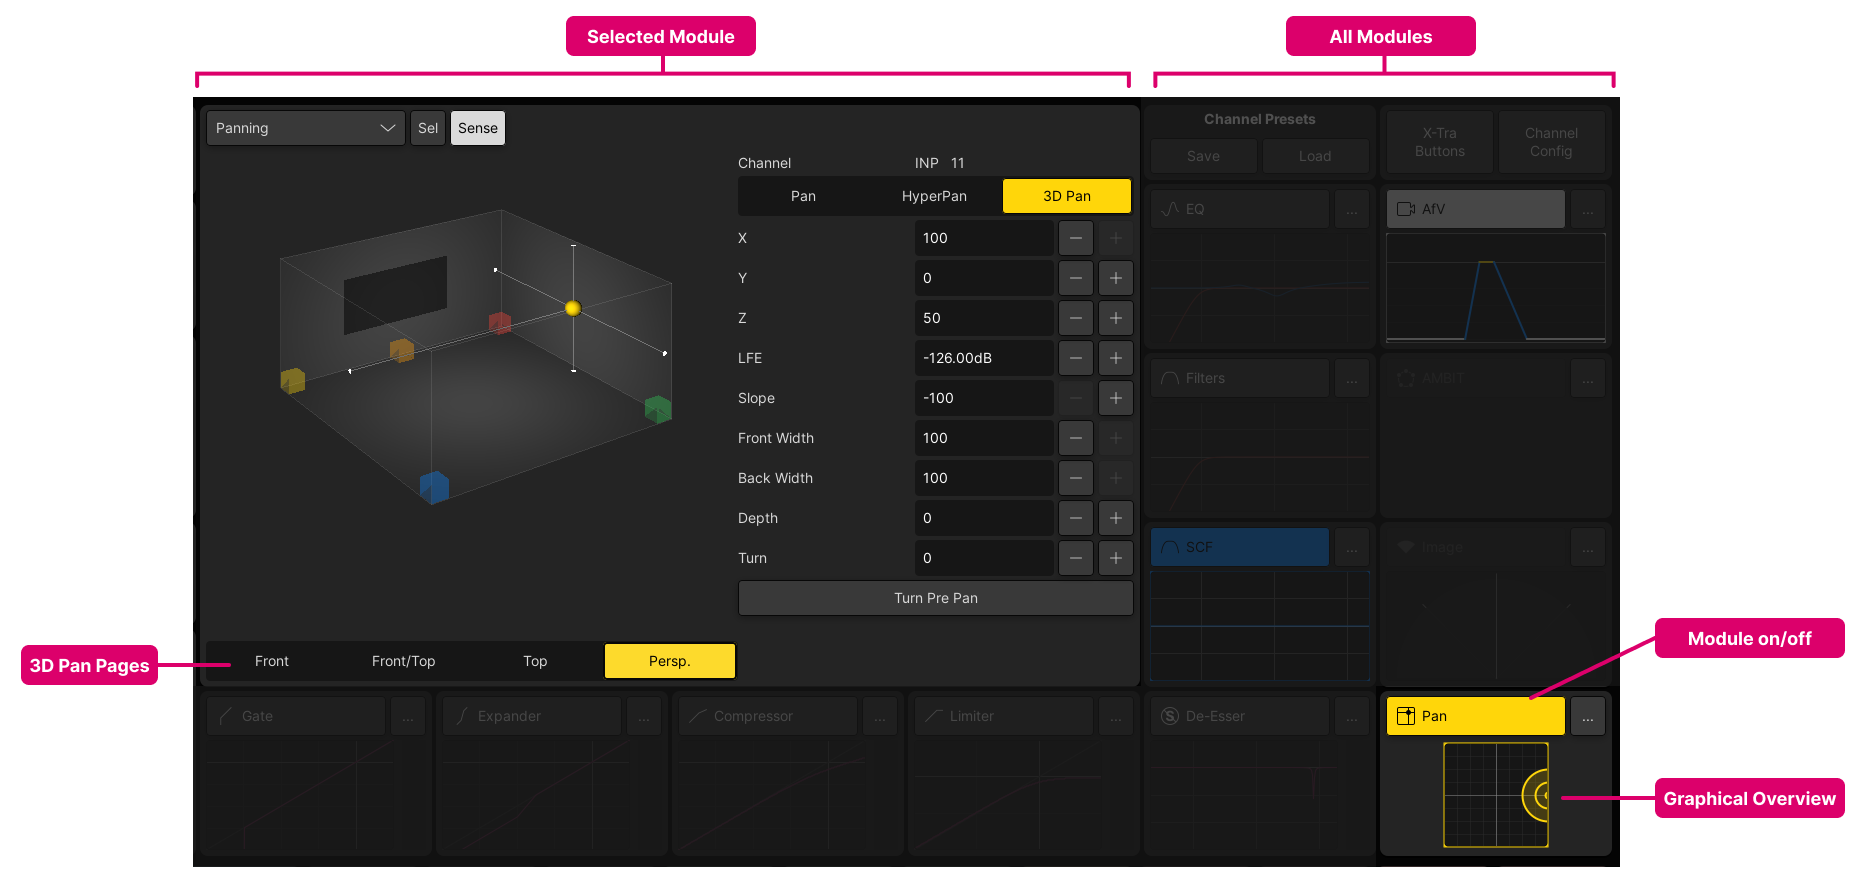
Start by selecting the channel you wish to pan and make sure that it is assigned to an appropriate output (e.g. a 5.1.4 sum).
- Touch the Pan module on/off button to switch panning into circuit.
- Below the on/off button is a graphical overview that shows the current pan position.
- If Sense is enabled, then the selected module updates automatically when you touch a graphical overview (on the Main Display).
- From the top of the selected module area, select 3D Pan (to reveal the 3D Pan sub pages).
- Each sub page provides a different view of the channel position: Front, Front/Top, Top or Perspective.
- Use the touch-screen buttons to change the parameter values. These are the same X, Y, Z, LFE and Slope (as described in mc²36 - Panning), and Front Width, Back Width, Depth and Turn (as described in mc²36 - Hyper Pan).
The images below show all four sub pages. In this example, the channel in access is a mono channel panned to the position: X = 100, Y = 0, Z = 50.
In each case, the 2D nodes are color-coded as follows.
- Yellow = Front Left
- Orange = Front Centre
- Red = Front Right
- Blue = Surround Left
- Green = Surround Right
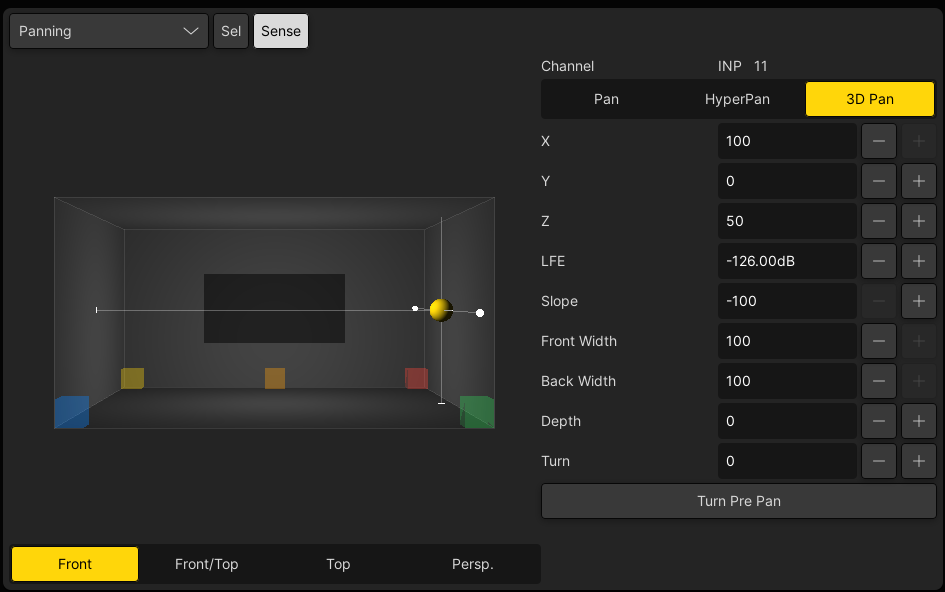
3D Pan: Front view
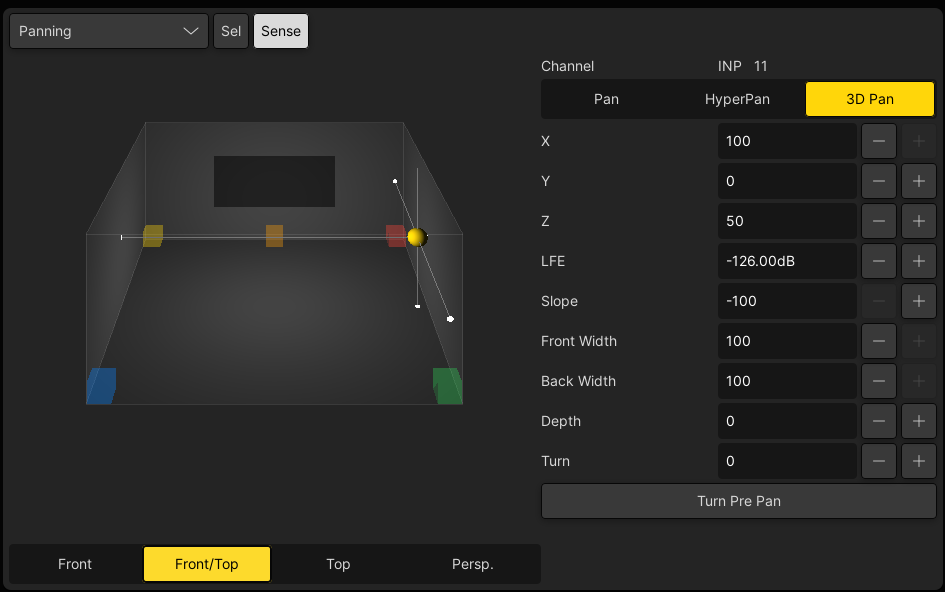
3D Pan: Front/Top view
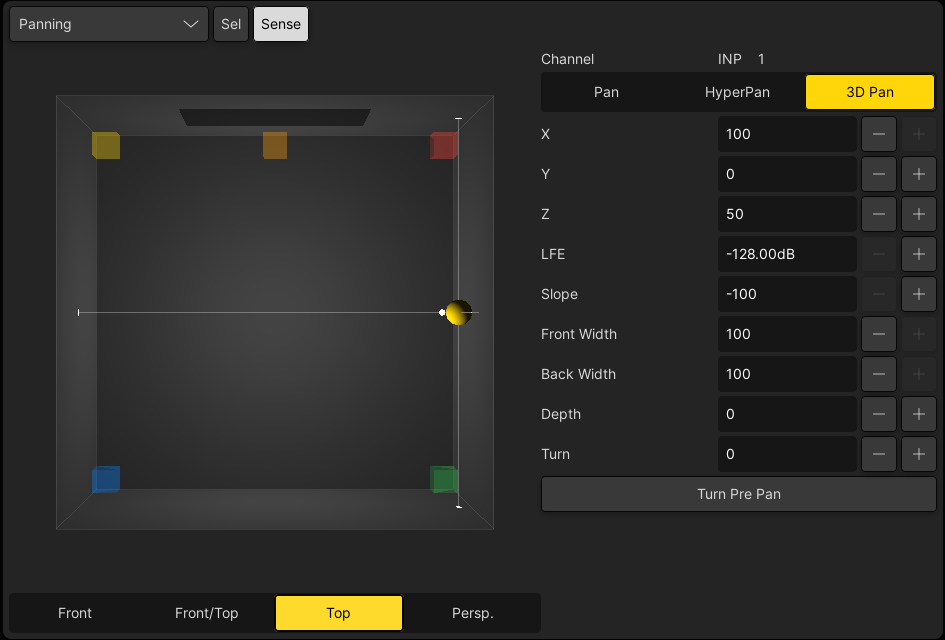
3D Pan: Top view
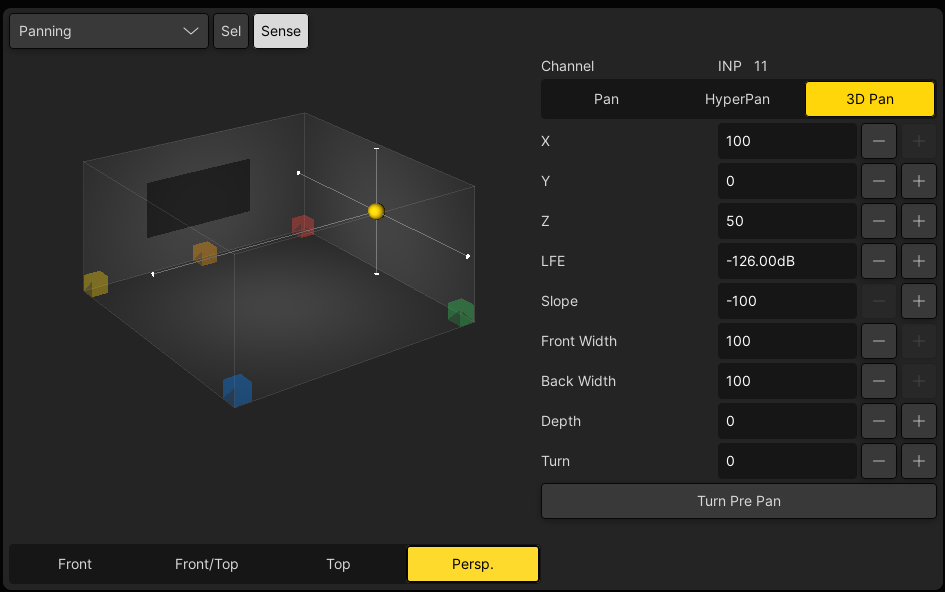
3D Pan: Perspective view